Deploying a Web Server using AWS EC2 and using Domain Name, DNS and its working process.
What is DNS?
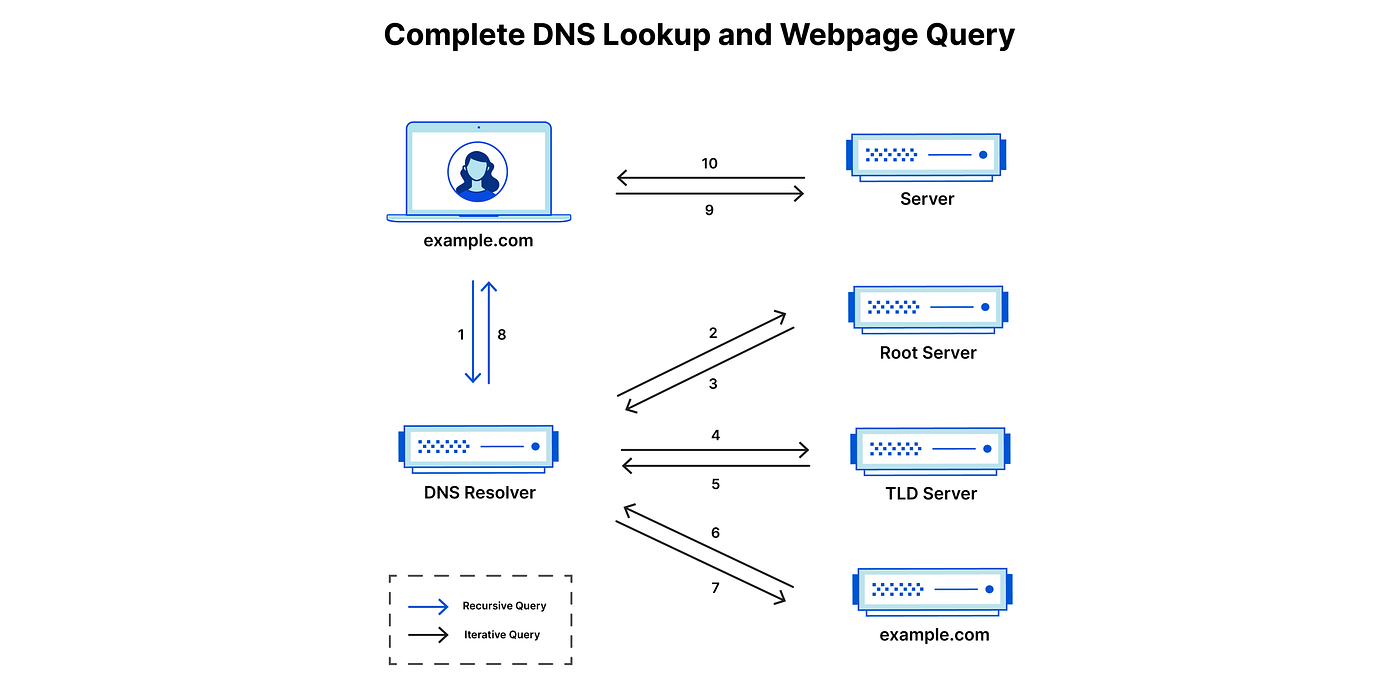 DNS is a crucial technology used in computer networking and the internet is called DNS, or Domain Name System. Its principal function is to convert human-friendly domain names into IP (Internet Protocol) addresses, which are digits that computers use to recognize one another on a network. This translation is required because people can remember and utilize domain names like “www.example.com” far more easily than they can a large string of digits like “192.168.1.1.”
Let’s see step by step how DNS works
- User Requests: A user’s computer must discover the corresponding IP address in order to connect when they type a domain name (such as www.example.com) into a web browser or click on a link.
- Local DNS Resolver: The user’s computer initially verifies whether the IP address for the requested domain is already stored in its local DNS resolver cache. The resolver moves on to the following stage if the data is either not in the cache or has expired.
- DNS Query: A DNS request is sent to a DNS server by the local DNS resolver. An internet service provider (ISP), a public DNS service like Google DNS (8.8.8.8), or a private DNS server within a company could all run this server.
- Iterative Resolution: The local DNS resolver will ping other DNS servers if its DNS server doesn’t have the necessary IP address details. Each DNS server in this repeated process either provides the solution or directs the resolver to another DNS server that might have the data. Until the resolver either obtains the IP address or concludes that the domain doesn’t exist, this process continues.
- Caching: After obtaining the IP address, the resolver keeps it in its cache for a predetermined period of time (TTL, or Time to Live). For websites that are regularly accessed, this caching helps eliminate the need for repetitive DNS queries.
- Response: The user’s machine can then use the IP address to connect to the specified web server after the local DNS resolver gives it to it.
Deploying Web server using AWS
Let’s first launch an EC2 instance with Amazon Linux or, preferable, Ubuntu through the AWS EC2 console.
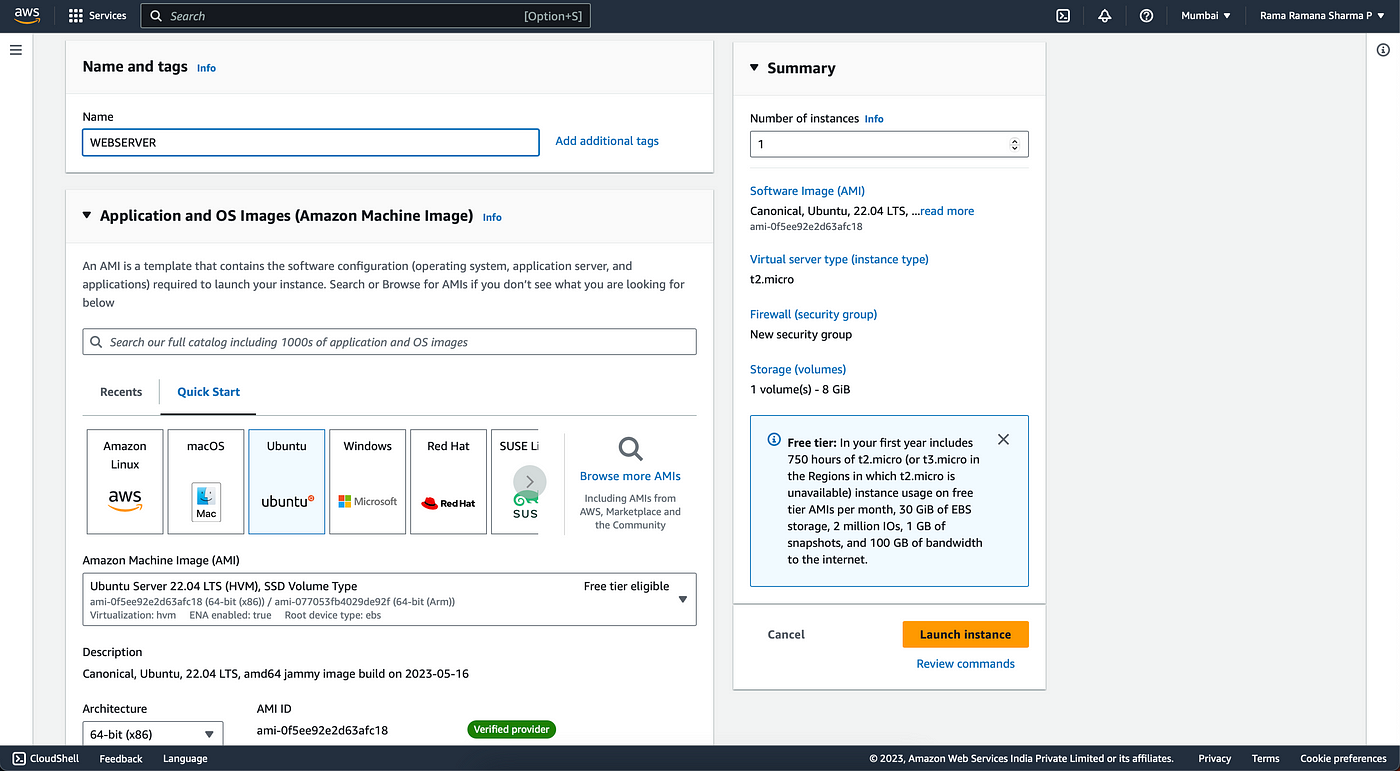
Generate a key pair as shown below.
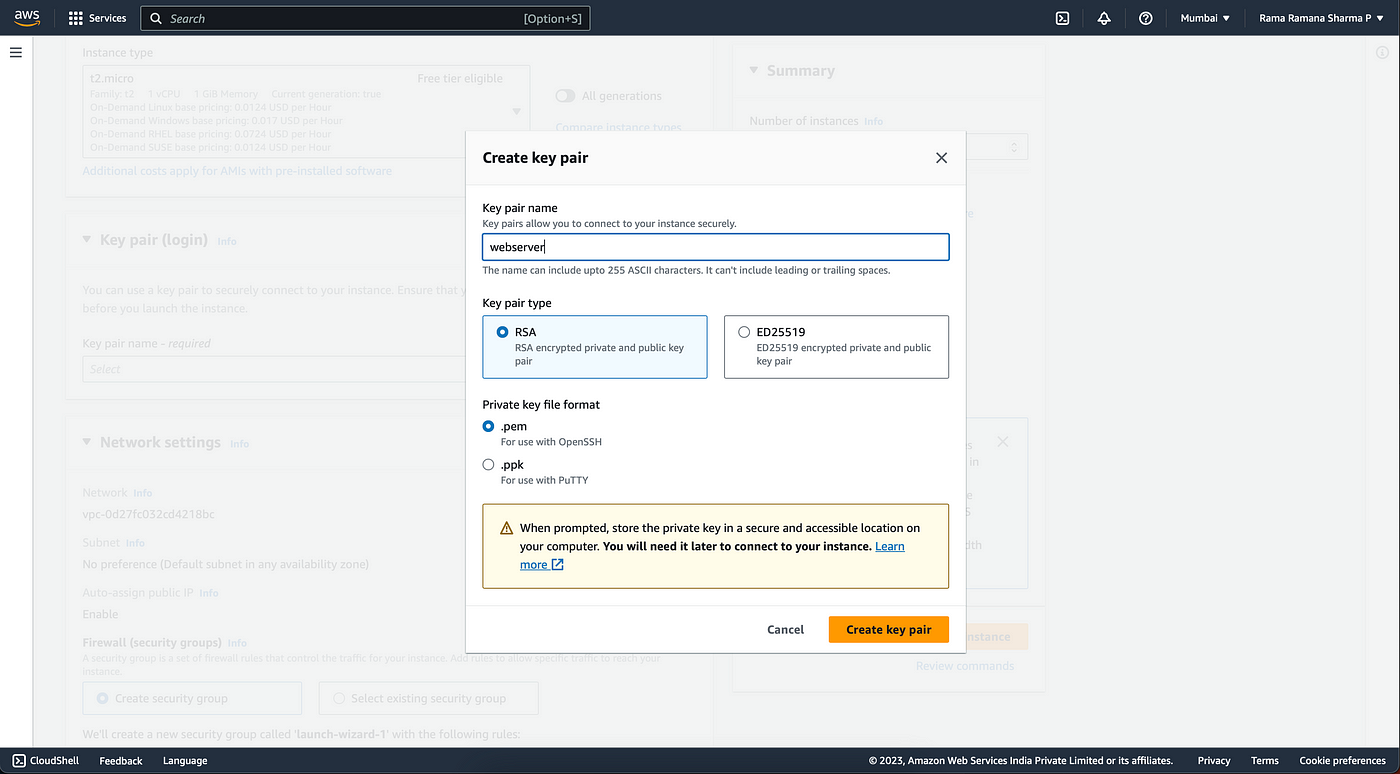
Make sure that you enable HTTPS and HTTP traffic in firewall security groups under Network Settings as shown below.
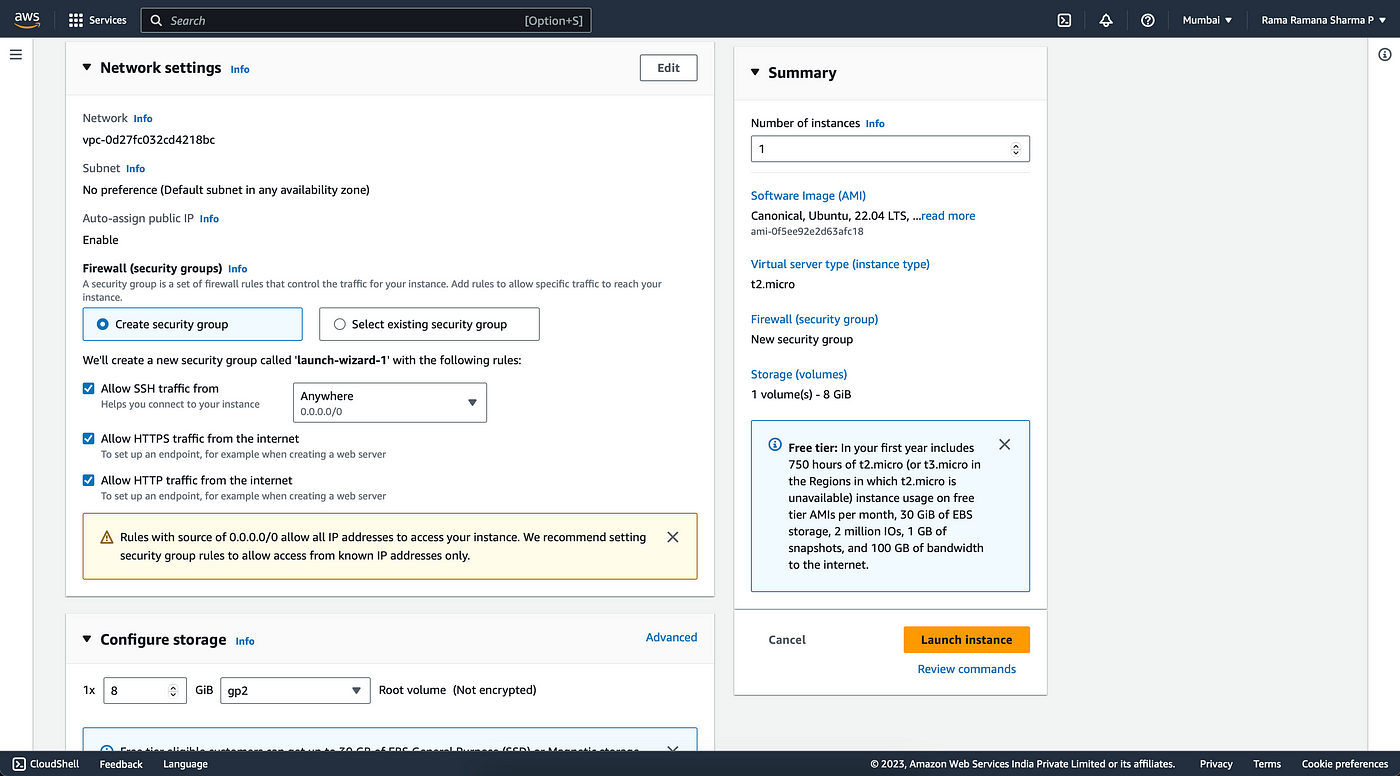
Make other adjustments in accordance with your needs, such as storage and Amazon Machine Image (AMI).
Click “Launch Instance” once all of the configuration has been completed.
Once the AWS server is running, click on connect.
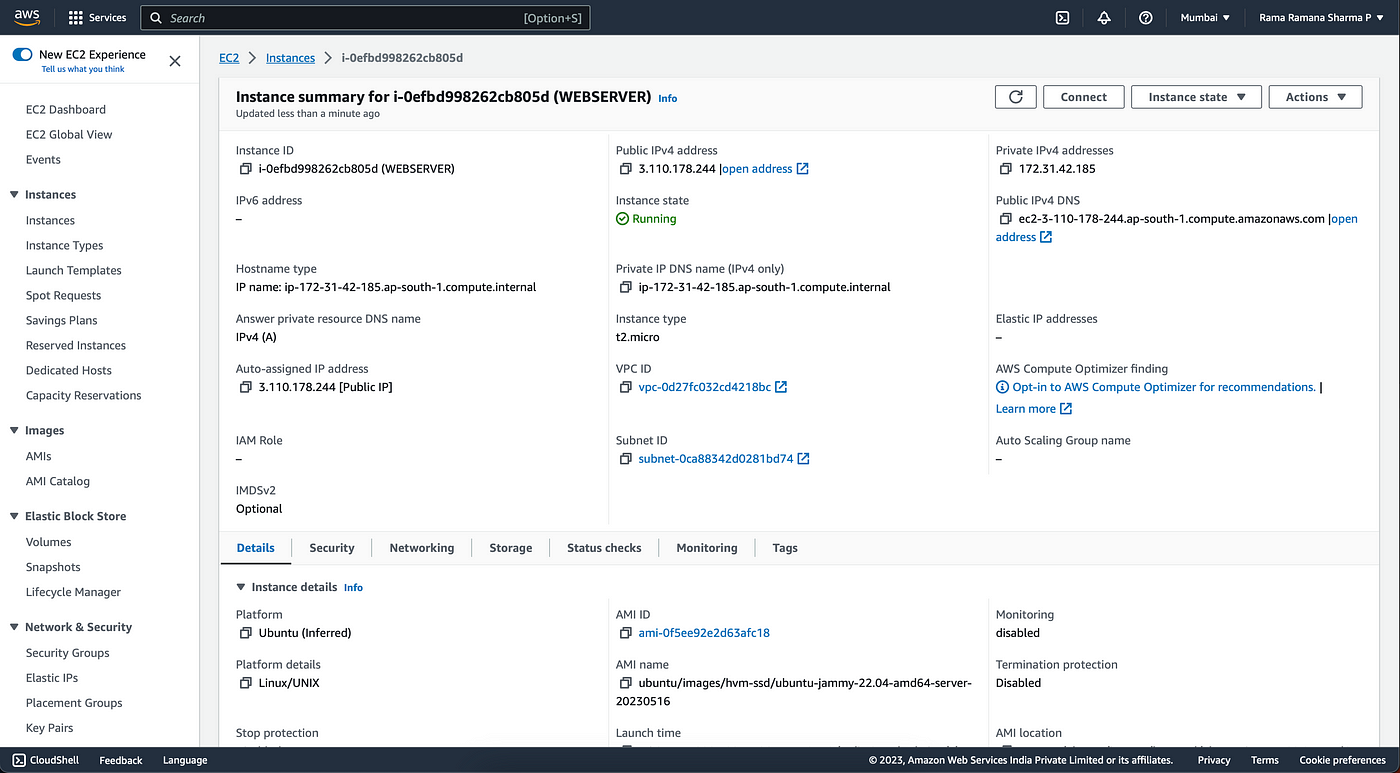
Selecting SSH will now offer information similar to what is seen below.
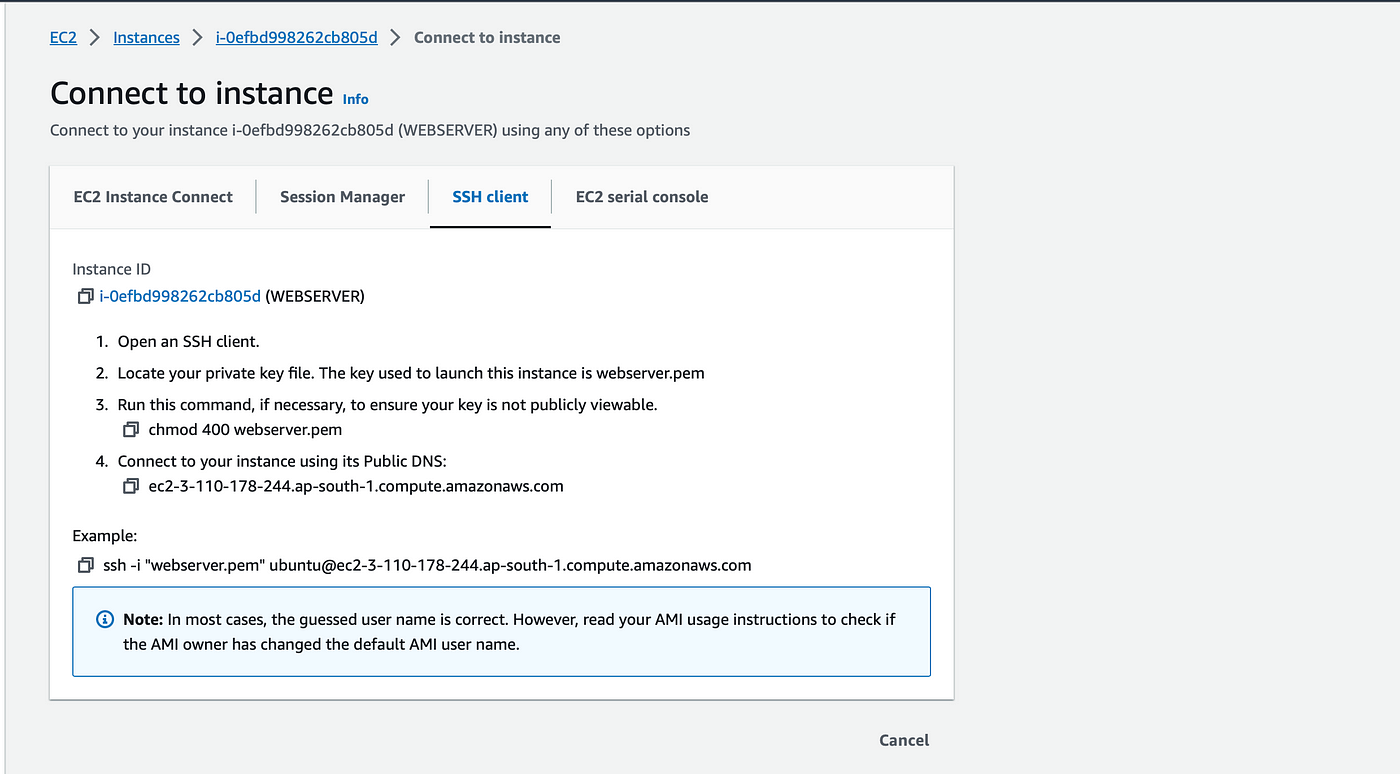
Execute the chmod command after copying it to the directory containing the key file. Copy the SSH command, and then use SSH to connect to the server.

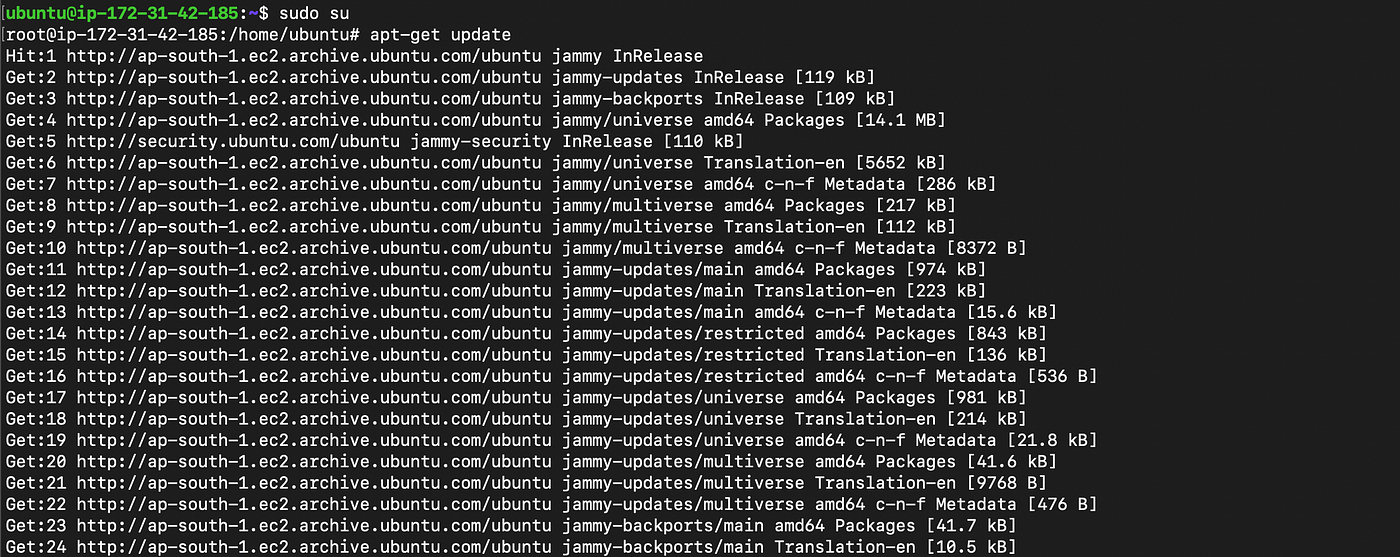
Once the connection is successful, run the update command and the upgrade command.
sudo su
apt-get update
apt-get upgrade

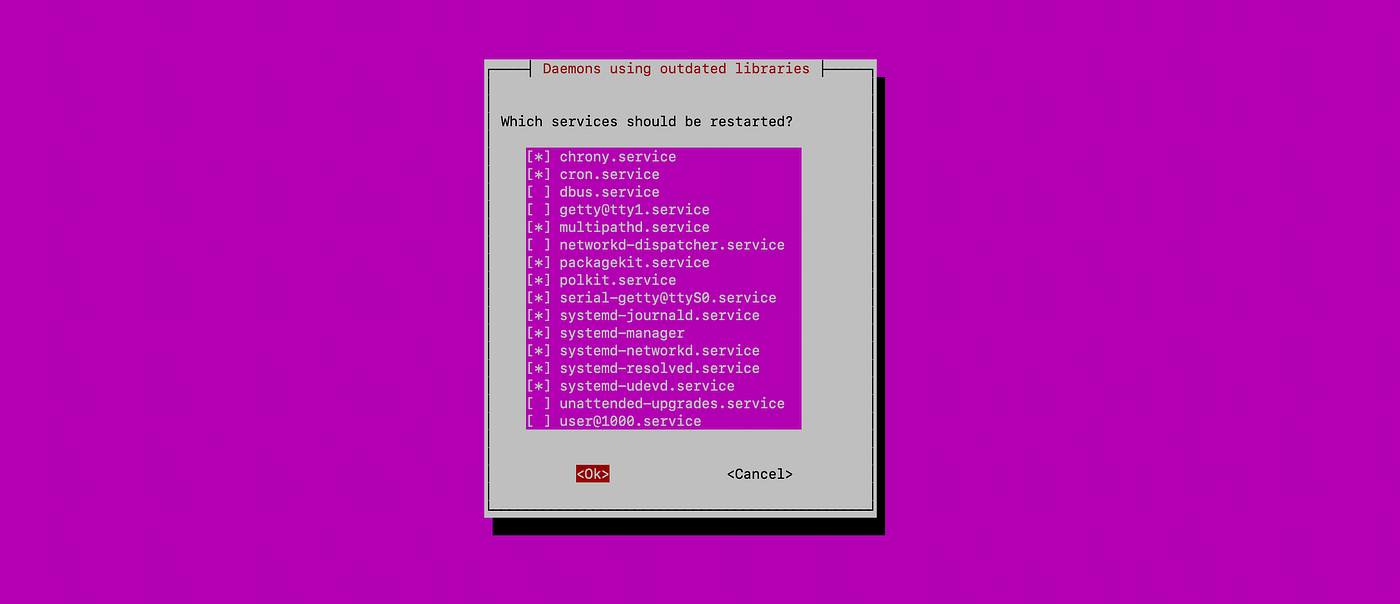
If a screen as shown below pop ups, select “Ok” and click Enter.
Installing apache2 using apt command.
apt install apache2

If the screen below pops up select “Ok” and click on Enter.

Check the status of apache2 as shown below.
systemctl status apache2

Now paste the Public IP of the instance in a browser make sure a similar page as shown below will appear.
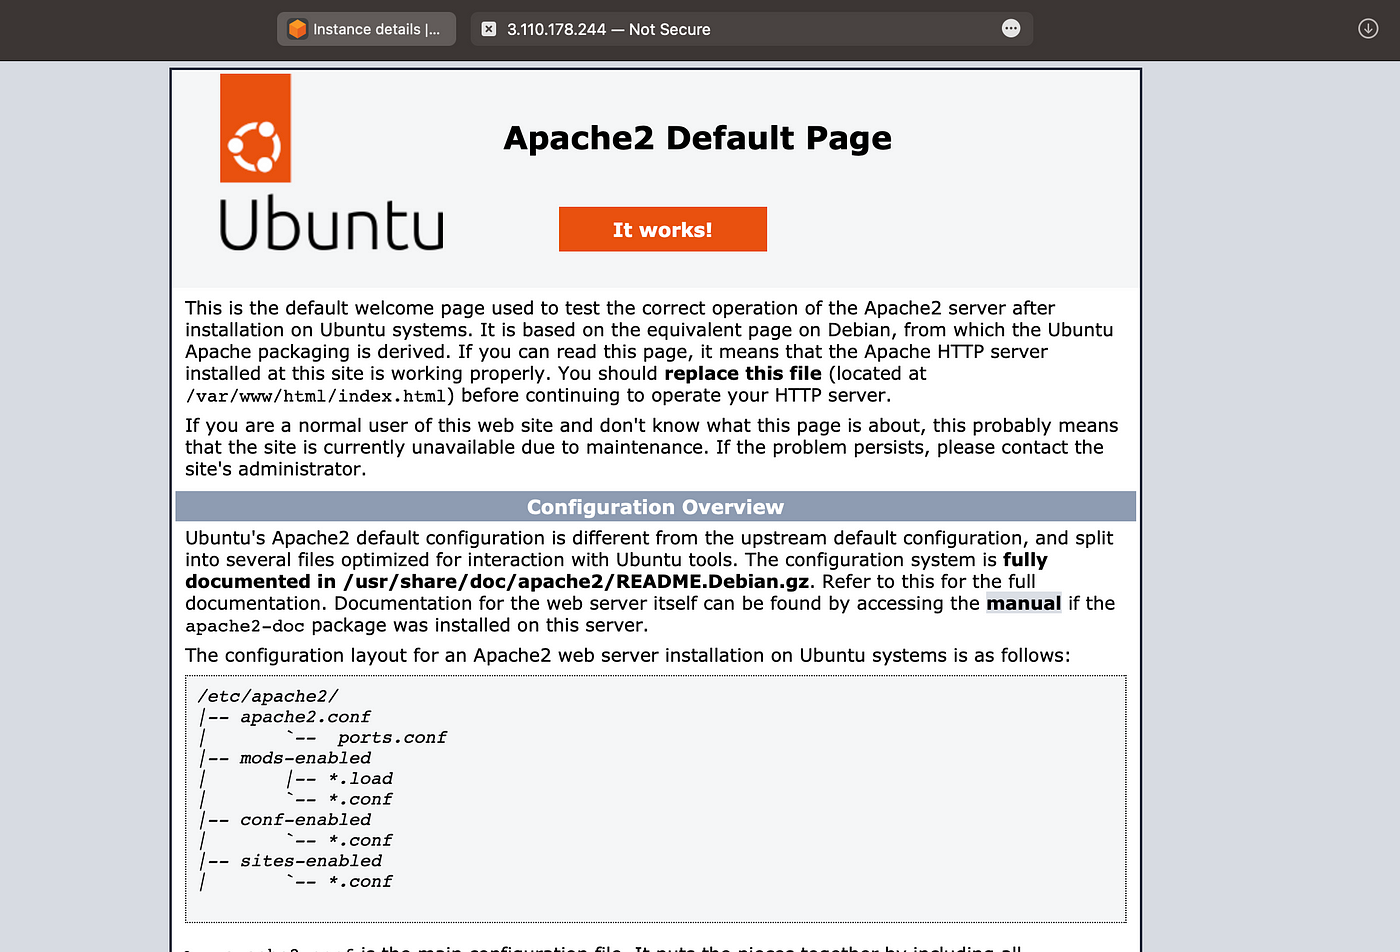
Now change the directory to /var/www/html and delete index.html file, and clone your git hub repository and move the files in cloned file to /var/www/html as shown below.


If the project file is in your local system and want to send it the remote server use scp command to send files to remote server.

Here with scp command as follows:
scp -i <key-file-name> -r <project-directory> <username>@<Public IPv4 DNS>:<directory>
Refresh the website that was previously accessible via the server IP to see your webpage as specified in your index.html file, as displayed below.

Now if you have domains from the providers like GoDaddy, Cloudflare, Namecheap and go to DNS settings and add records as shown below, where the IPs are server Public IP.
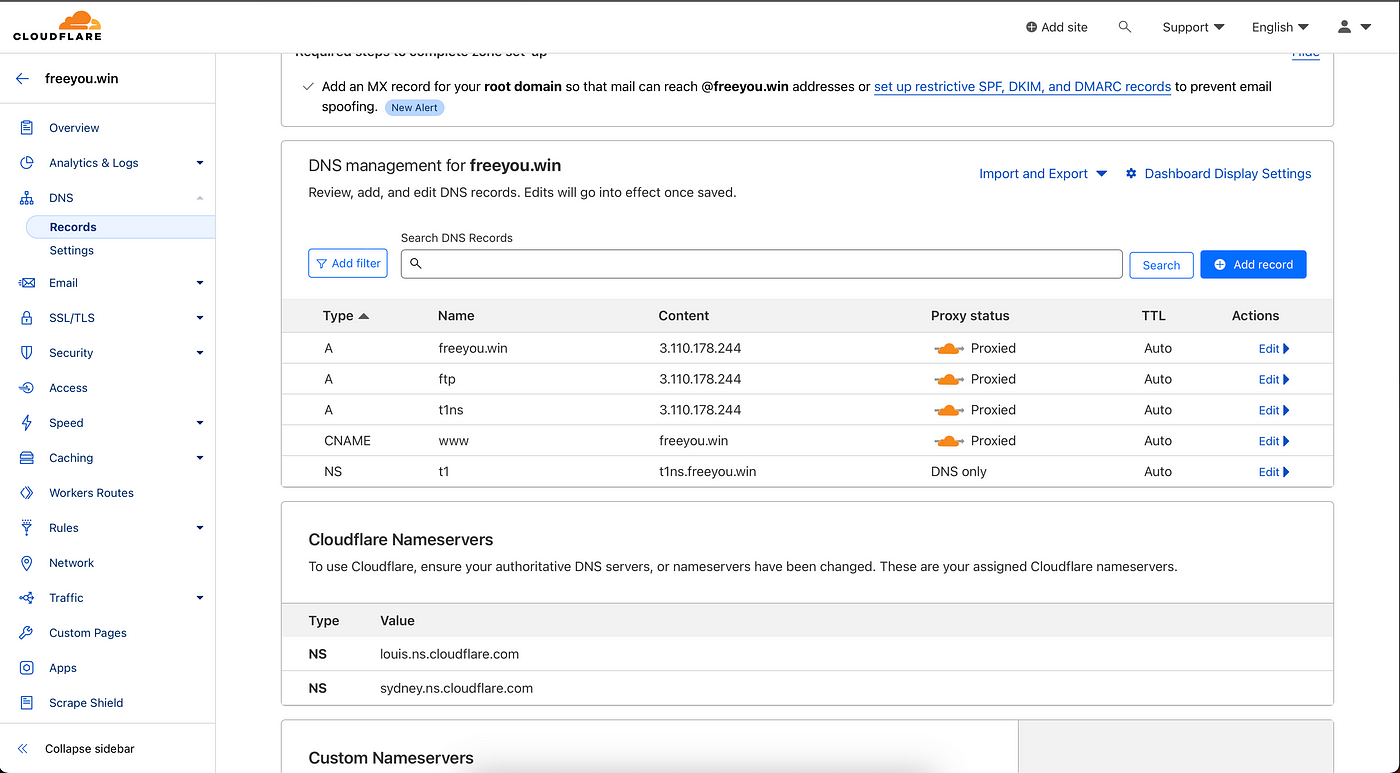
Now enter the domain name into a web browser to see the same outcome as when you entered the IP address.

Subscribe to our YouTube channel. https://www.youtube.com/@CyberToolGuardian/featured
Follow us on Instagram.
https://instagram.com/cybertoolguardian
Comments
Post a Comment